As a seasoned automotive enthusiast, I’m always seeking new challenges. Recently, that challenge presented itself in the form of a cam phaser replacement on my 2018 Ford Raptor. With a background steeped in motorcycle mechanics and a healthy dose of DIY spirit, I embarked on this 40-hour endeavor, armed with service manuals, online resources, and a determination to save a significant chunk of change.
The Why and The How
My Raptor, despite its relatively young age of 97,000 miles, had already undergone two cam phaser replacements under warranty. This time, with the telltale rattle rearing its ugly head, I was determined to tackle the job myself. After meticulous research, including Ford’s customer satisfaction bulletin, I gathered the necessary parts, including the latest ML3Z phasers, timing chains, tensioners, and a few other preventative maintenance items.
Challenges and Triumphs
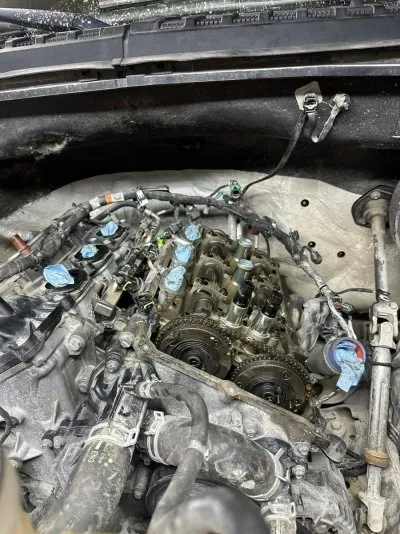
This wasn’t a walk in the park. Breaking free the valve covers and front cover tested my patience and prying skills. The AC belt installation, a seemingly simple task, became an exercise in frustration, requiring creative solutions involving zip ties and the old belt. The real heart-stopper was the worn-out driver’s side intake cam phaser. It was so loose that the camshaft wasn’t always rotating with the phaser – a clear indication of the severity of the issue.
 IMG_3997.JPEG
The culprit: A severely worn cam phaser.
Lessons Learned: Tips for the Intrepid DIYer
Through this experience, I gleaned valuable insights that I’m eager to share with fellow enthusiasts:
- Brute Strength and Finesse: The valve covers and front cover require significant force to remove. Patience and the right prying technique are key.
- Practice Makes Perfect: The front cover RTV application requires precise timing. I highly recommend a few dry runs before the real deal.
- Tool Up: Invest in a digital torque wrench capable of measuring degrees. The tight tolerances of the phaser bolts necessitate accuracy. A long torque wrench and the vice-grip method, as demonstrated in the video resource, are invaluable for this step.
- Timing is Everything: Ensure all slack is on the tensioner side when reinstalling the timing chains to prevent catastrophic timing jumps.
- Surface Prep is Key: Take your time with cleaning and prepping surfaces. Re-doing the front cover due to a leak is not an experience you want.
- Fuel Line Freedom: For easier access, remove the high-pressure fuel line from the pump to the injector rail instead of just trying to work around it.
- Harness Management: Unplugging the rear harness from the PCM provides much-needed slack when wrestling with the right valve cover.
- Respect the Christmas Tree: While a few broken wire retentions won’t hurt, try to preserve as many as possible.
- Embrace Ford’s Design: Ford deserves credit for their well-designed harnesses and coolant hoses. They practically fall into place during reassembly.
- Alternator Removal Hack: A few taps on the alternator bolt with a mallet can help release the dowel insert, simplifying removal.
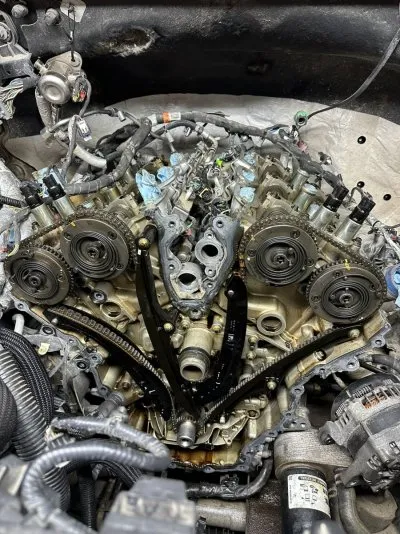
 IMG_4013.JPEG
A view inside the engine bay with the timing chains exposed.
The Sweet Taste of Victory
Forty hours, a few busted knuckles, and a whole lot of learning later, my Raptor roared back to life. The satisfaction of successfully completing this complex repair myself, coupled with the $4,300 saved compared to the dealership quote, was immensely gratifying.
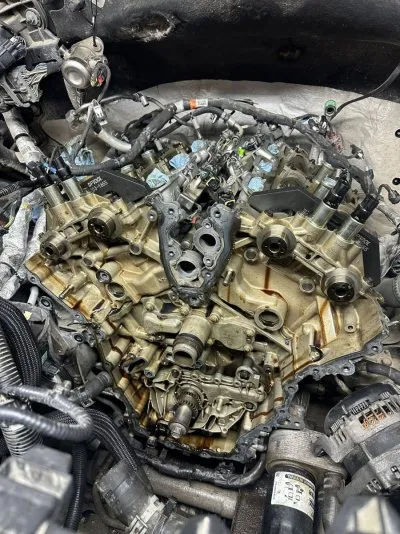
 IMG_4015.JPEG
The new ML3Z phasers in place.
Would I do it again? Absolutely! This experience solidified my belief that with the right information, tools, and a healthy dose of determination, almost any repair is achievable in your own garage.
Your Turn to Share
Have you tackled a cam phaser replacement or a similar engine repair? Share your experiences and tips in the comments below! Let’s learn from each other and empower more DIY enthusiasts.